When was the last time you checked your gutters? While it’s easy to overlook this part of your home, ensuring they are in good condition is crucial. A well-maintained gutter system can protect your home from water damage, save you money on repairs, and enhance your home’s curb appeal. With a little bit of effort, homeowners can master the art of gutter repair. This guide will walk you through the process, offering insights and tips to keep your gutters functioning smoothly, including:
- Understanding your gutter system
- Essential tools for gutter repair
- 6 DIY gutter repair steps
- Preventing future gutter issues
🤔 Understanding Your Gutter System

Gutters are more than just metal tubes hanging from your roof. They play a vital role in channeling rainwater away from your home’s foundation, preventing water damage and erosion. Typical gutters are made from materials like aluminum, steel, or vinyl, each with its own strengths and weaknesses.
Aluminum gutters are rust-resistant and lightweight, making them a popular choice for many homeowners. Steel gutters are durable but prone to rust if not properly maintained. Vinyl gutters, while inexpensive and easy to install, can become brittle in cold weather. Understanding your gutter material will help you tailor your maintenance and repair efforts.
Beyond materials, it’s essential to recognize the components of a gutter system, which include downspouts, end caps, fascia brackets, and splash blocks. Each of these components needs to function correctly to ensure your gutter system works effectively. By familiarizing yourself with these parts, you’ll be better equipped to identify and address problems.
Common Gutter Problems
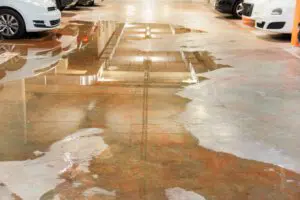
While gutters might seem straightforward, they can encounter a variety of issues. One of the most common problems is clogging. Leaves, twigs, and other debris can accumulate in the gutters, blocking water flow and causing overflow. This overflow can lead to water damage and even affect your home’s foundation.
Leaking is another frequent issue. Small holes, cracks, or separated joints can allow water to escape the gutters, leading to potential damage to the fascia boards and siding. Sagging gutters can occur when the brackets become loose or broken, causing the gutters to pull away from the home. This not only affects the gutter’s efficiency but can also lead to additional damage.
Rust and corrosion, especially in metal gutters, can compromise the integrity of your gutter system. Keeping an eye out for these issues and addressing them promptly can prevent more significant problems down the line.
Signs Your Gutters Need Repair
Knowing when your gutters need attention is crucial to maintaining their functionality:
- Water spilling over the sides during rain suggests a clog or improper slope preventing water from flowing correctly.
- Visible sagging or pulling away from the house can indicate that the brackets need tightening or replacing.
- Rust spots or peeling paint can signal that water is leaking and causing damage.
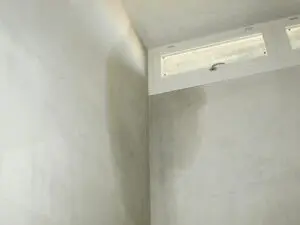
- Water stains or mildew on your home’s siding or foundation are telltale signs of leaking gutters.
Regular inspections, especially during and after rainstorms, can help you catch these issues early.
🧰 Essential Tools for Gutter Repair
Before diving into repairs, make sure you have the right tools on hand. A sturdy ladder is crucial for reaching your gutters safely. It’s always a good idea to have a friend or family member spot you while you’re on the ladder.
You’ll also need a good pair of work gloves to protect your hands from sharp edges and debris. A gutter scoop or trowel is handy for removing leaves and dirt. A garden hose with a spray nozzle can help clear out clogs and test repairs.
For sealing leaks, you’ll need a tube of gutter sealant or silicone caulk and a caulking gun. If you’re fixing sagging gutters, a cordless drill and extra fascia brackets will be necessary. Having these tools ready will streamline your repair process and save you time.
Safety Precautions to Take
Safety should always be a priority when working on gutter repairs. Start by inspecting your ladder for any signs of wear or damage before climbing. Make sure it’s positioned on a flat, stable surface, and never lean too far to the side.
Wear non-slip shoes to reduce the risk of slipping. Weather can also impact safety. Avoid working on gutters in wet or windy conditions, as these can increase the risk of accidents.
It’s also important to protect your eyes from flying debris by wearing safety goggles. If you have a tall home or feel uncomfortable working at heights, consider hiring a professional for the job. Taking these precautions will help ensure a safe and successful repair experience.
🛠️ 6 DIY Gutter Repair Steps

Proper gutter maintenance is crucial to preventing water damage to your home’s foundation and avoiding costly repairs. By following these DIY gutter repair steps, you can ensure your gutters function effectively and protect your property.
1. Identify the Problem
Begin by performing a comprehensive inspection of your gutters to identify the specific issues present. Carefully examine the entire gutter system for common signs of problems such as clogs, leaks, and sagging. Check for blockages caused by leaves and debris, inspect for any visible gaps or holes that could cause leaks, and observe whether any sections of the gutter are sagging or pulling away from the house. Understanding the precise nature of these problems will help you take the appropriate steps to fix them effectively.
2. Clear Debris
Once you’ve identified any blockages, it’s time to clear them out. Use a gutter scoop or small shovel to carefully remove leaves, twigs, and other debris from the gutters, working your way along the entire length of the system. Be sure to dispose of the debris properly to avoid it finding its way back into the gutters.
After removing the bulk of the debris, use a garden hose to flush out any remaining dirt and small particles. Aim the hose down the gutter from a ladder, ensuring the water flows smoothly through the system and out the downspouts. This will not only ensure the gutters are clean but also help test for proper water flow and identify any remaining issues such as leaks or areas where water is pooling.
3. Sealing Leaky Gutters
Leaky gutters can lead to significant water damage if left unaddressed. Start by identifying the source of the leak. It could be a small hole, a crack, or a separated joint. Once identified, clean the area thoroughly, removing any dirt or debris.
With a clean surface, apply gutter sealant to the affected area. Ensure you use a sealant specifically designed for gutters, as this will provide a more durable and waterproof bond. Apply the sealant generously, covering the entire leak, and then smooth it out with a putty knife or your finger.
Allow the sealant to cure according to the manufacturer’s instructions before testing with water. Regularly inspect your gutters for any new leaks and address them promptly to avoid further damage.
4. Fixing Sagging Gutters
Sagging gutters can affect water flow and lead to more severe damage. Begin by checking the brackets that hold the gutters in place. If they’re loose, tighten them using a cordless drill. If they’re damaged or missing, replace them with new ones.
Ensure the gutters have the correct slope by checking the alignment. They should have a slight downward angle toward the downspouts to facilitate proper water flow. If needed, adjust the brackets to achieve the appropriate slope.
Test the gutters with water to ensure everything is functioning correctly. By addressing sagging quickly, you can prevent additional issues and maintain the efficiency of your gutter system.
5. Replacing Damaged Sections
In some cases, it may be necessary to replace entire sections of your gutters. Start by measuring the damaged section and purchasing a replacement piece of the same material. You’ll also need connectors to attach the new section to the existing gutters.
Remove the damaged section by unscrewing the brackets and carefully detaching it. Clean the surrounding area to ensure a secure connection. Attach the new section using connectors and fasten it with brackets.
Ensure the new section aligns with the rest of the gutters and has the correct slope. Test the system with water to confirm that everything is working as it should. Replacing damaged sections can help maintain your home’s curb appeal and prevent water damage.
6. Cleaning and Maintenance Tips
Regular cleaning and maintenance are essential for keeping your gutters in top condition. Aim to clean your gutters at least twice a year, in spring and fall. If you have trees close to your home, more frequent cleaning may be necessary.
Use a gutter scoop or trowel to remove leaves and debris, and follow up with a garden hose to flush out any remaining dirt. Regularly inspect your gutters for signs of damage, such as leaks, sagging, or rust. Address these issues promptly to prevent further problems.
Consider installing gutter guards to reduce the amount of debris that enters your gutters. While these won’t eliminate the need for cleaning, they can significantly reduce the frequency and effort required.
🛑 Preventing Future Gutter Issues

Maintaining the efficiency and longevity of your gutter system involves more than just regular cleaning; it also requires strategic preventative measures. Here are some ways to enhance the performance of your gutters and avoid costly repairs:
- Regular Inspection and Maintenance: Schedule routine inspections to identify early signs of wear and tear. Look for leaks, rust, or loose segments that could lead to more significant problems if left unaddressed.
- Trimming Overhanging Branches: Trees surrounding your home can contribute to debris buildup in your gutters. Trimming back overhanging branches helps minimize the leaves and twigs that fall into your gutters, reducing blockages and ensuring a smoother water flow.
- Downspout Management: Keep downspouts clear of obstructions and make sure they are positioned to direct water at least three feet away from your home’s foundation. This practice helps prevent soil erosion and potential water damage to your basement or crawl space.
- Investing in Quality Materials: Consider investing in high-quality gutter materials and durable components designed to withstand your local climate conditions. This investment can significantly reduce the frequency of repairs and extend the lifespan of your gutter system.
- Installing Gutter Guards: Gutter guards can be a valuable addition to your gutter system. They act as a barrier against debris, reducing the frequency of clogs and making maintenance easier. With gutter guards, water flows more efficiently through the system, minimizing overflow during heavy rainfall.
- Professional Cleaning and Inspection: Periodically hire professionals for a thorough cleaning and inspection. Professionals have the tools and expertise to reach areas that are difficult to maintain on your own, ensuring that your gutters are functioning optimally.
By taking these preventative steps, you can protect your home from water-related damage and extend the life of your gutter system, ensuring it continues to perform effectively year after year.
🙌 Protect Your Home: Expert Gutter Maintenance and Repair Services
Maintaining your gutters is essential for protecting your home from water damage and preserving its value. By following this guide, homeowners can confidently tackle common gutter issues and ensure their gutters remain in good condition.
However, some repairs may require professional expertise. That’s where All Phase Restoration comes in. Our team of certified and licensed roofers is ready to assist with all your gutter and roofing needs. We offer prompt, professional service using high-quality materials and expert craftsmanship.
Don’t wait for a small issue to become a significant problem. Contact All Phase Restoration today and experience the peace of mind that comes with knowing your home is in good hands. Our team is here to help with all your gutter repair needs in Ohio.