Your roof works hard every day to protect your home and family from the elements. But over time, exposure to wind, rain, hail, and sun can cause individual shingles to crack, curl, or go missing entirely. Learning how to identify and address damaged roof shingles can save you from costly repairs and help maintain your home’s protection.
This comprehensive guide will walk you through everything you need to know about damaged roof shingles, from spotting the warning signs to understanding when professional help is necessary. We’ll cover:
- How to identify damaged roof shingles from the ground and up close
- Step-by-step instructions for replacing damaged shingles yourself
- When to call professional roofing contractors
- Maintenance tips to extend your roof’s lifespan
🔎 Identifying Damaged Roof Shingles

Recognizing damaged roof shingles early can prevent minor issues from becoming major problems. Regular inspection is key to maintaining your roof’s integrity and protecting your home.
Visual Signs of Shingle Damage
Start your inspection from the ground using binoculars to scan your roof systematically. Look for obvious signs like missing shingles, which appear as dark patches or exposed underlayment. Curled or buckled shingles often indicate age-related deterioration or moisture issues.
Granule loss is another common problem. Check your gutters for excessive granule accumulation, which appears as coarse sand or small pebbles. While some granule loss is normal over time, significant amounts suggest your shingles are reaching the end of their lifespan.
Cracked or split shingles may be visible from the ground, appearing as dark lines across the shingle surface. These cracks can allow water to penetrate your roofing system, leading to leaks and structural damage.
Interior Warning Signs
Don’t forget to inspect your home’s interior for signs of roof damage. Water stains on ceilings or walls often indicate compromised shingles above. These stains may appear as brown or yellow discoloration and can signal ongoing leaks.
Check your attic regularly for signs of water intrusion. Look for wet insulation, mold growth, or daylight coming through the roof boards. These symptoms suggest damaged roof shingles that need immediate attention.
✅ 7 Steps to Replace Damaged Roof Shingles

Replacing damaged roof shingles is a manageable DIY project for homeowners comfortable working at heights. However, always prioritize safety and consider professional help for extensive damage or steep roofs.
1. Gather Your Tools and Materials
Before starting, collect all necessary tools and materials. You’ll need replacement shingles that match your existing roof, a hammer, flat pry bar, utility knife, roofing nails, and roofing cement. Safety equipment includes a sturdy ladder, safety harness, and non-slip shoes.
Choose a calm, dry day for your repair work. Avoid working on wet or windy days, as these conditions significantly increase the risk of accidents.
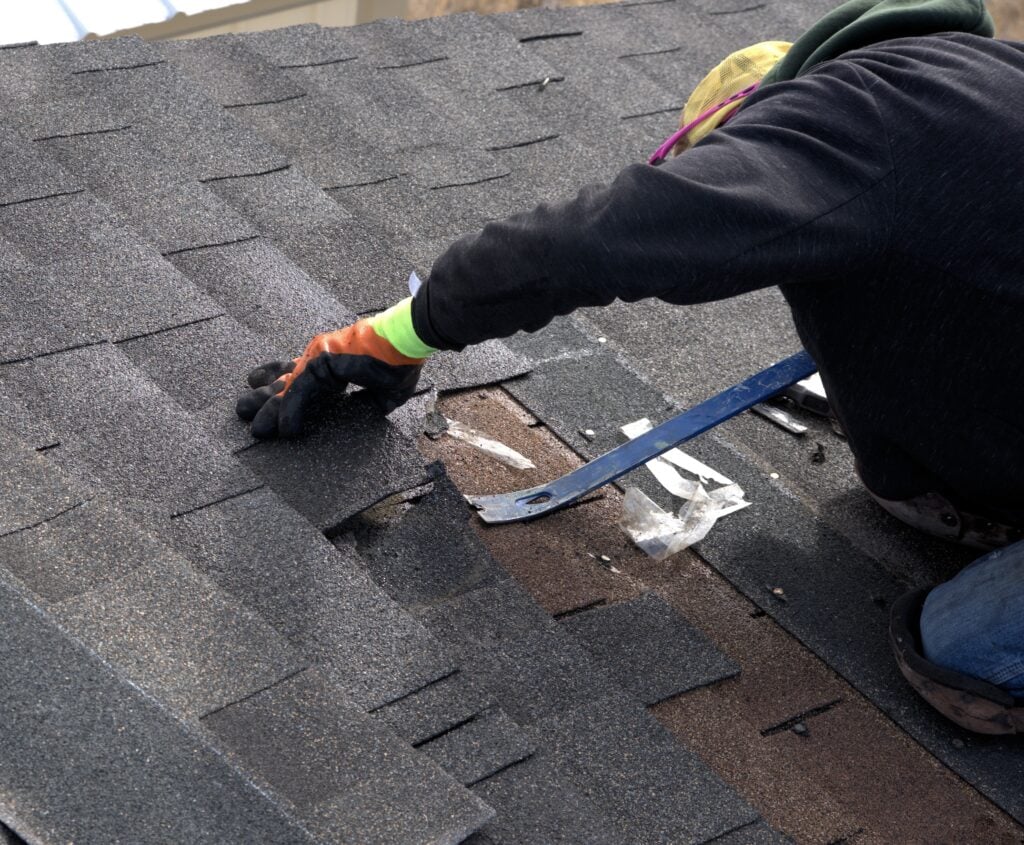
2. Remove the Damaged Shingle
Start by carefully lifting the shingle above the damaged one. Use your pry bar to remove the nails holding the damaged shingle in place. Most shingles are secured with four to six nails, located near the top edge.
Work slowly to avoid damaging surrounding shingles. If the shingle is severely damaged, you may need to break it into pieces for easier removal.
3. Remove Remaining Nails
After removing the damaged shingle, locate and remove any remaining nails from the roof deck. These nails typically go through the shingle below, so you’ll need to lift that shingle slightly to access them.
Use your hammer to drive any protruding nails flush with the roof deck, or remove them completely if they’re loose or corroded.
4. Prepare the New Shingle
Cut your replacement shingle to the correct size if necessary. Most standard shingles will fit without modification, but custom cuts may be needed for edge pieces or repairs around roof penetrations.
Apply a small amount of roofing cement to the back of the new shingle, focusing on the areas that will contact the roof deck.
5. Install the New Shingle
Slide the new shingle into position, aligning it with the surrounding shingles. Make sure the replacement shingle matches the exposure pattern of your existing roof.
Secure the shingle with roofing nails, placing them in the same locations as the original fasteners. Drive nails firmly but don’t overdrive them, as this can damage the shingle.
6. Seal the Installation
Apply roofing cement over the nail heads to prevent water penetration. Also, add a small amount of cement under the edges of overlapping shingles to ensure a watertight seal.
Press down firmly on all overlapping shingles to ensure proper adhesion. The sun’s heat will help activate the adhesive strips on the shingles.
7. Clean Up and Inspect
Remove all debris from your roof and gutters. Loose nails or shingle pieces can cause damage or injury if left behind.
Inspect your repair work from the ground to ensure the new shingle blends properly with the existing roof and that all edges are secure.
👨🔧 When to Call Professional Roofers
While minor shingle repairs can be DIY projects, certain situations require professional expertise. Extensive damage, structural issues, or safety concerns warrant calling experienced roofing contractors.
Signs You Need Professional Help
If you discover multiple damaged shingles across different areas of your roof, this often indicates a larger problem that requires professional assessment. Widespread damage may signal the need for partial or complete roof replacement.
Damage to flashing, gutters, or roof structure should always be handled by professionals. These components require specialized knowledge and tools to repair properly.
Safety Considerations
Steep roofs, multi-story homes, or roofs with complex designs pose significant safety risks for amateur repairs. Professional roofers have the proper equipment and training to work safely in these conditions.
If you’re uncomfortable working at heights or lack the necessary safety equipment, don’t risk injury. Professional roofers can complete repairs quickly and safely.
🛠️ Preventive Maintenance for Roof Shingles

Regular maintenance extends your roof’s lifespan and prevents minor issues from becoming major problems. Simple preventive measures can save you thousands of dollars in repair costs.
Regular Inspections
Inspect your roof at least twice yearly, preferably in spring and fall. Look for loose, damaged, or missing shingles, and address problems promptly. Early detection allows for easier and less expensive repairs.
After severe weather events, conduct additional inspections to identify new damage. Document any damage with photos for insurance purposes.
Gutter Maintenance
Clean gutters regularly to prevent water backup that can damage shingles and roof structure. Clogged gutters can cause water to pool under shingles, leading to rot and leaks.
Check for excessive granule accumulation in gutters, which may indicate accelerated shingle wear. Address the underlying cause of granule loss to prevent further damage.
Professional Maintenance
Schedule professional roof inspections every few years, especially for older roofs. Professional roofers can identify potential problems that homeowners might miss and recommend preventive measures.
Consider professional maintenance services that include gutter cleaning, minor repairs, and comprehensive inspections. These services often cost less than emergency repairs and help maintain your roof warranty.
👨🔧 Protect Your Home with Professional Expertise
At AllPhase Restoration, we know how critical a strong, reliable roof is to protecting your home and family. With years of experience and a commitment to quality craftsmanship, our team is dedicated to providing top-notch roofing repairs that last. From thorough inspections to using only premium materials, we go the extra mile to ensure your roof stands up to Ohio’s unpredictable weather.
Don’t leave your home’s protection to chance—trust the experts who care about your peace of mind. Contact AllPhase Restoration today for a free roof inspection and let us help you safeguard your home for years to come!


